When your client clicks I want this website, they create a free Wix account and purchase the Light plan that hosts the site you showed them. The entire process takes about five minutes. This article walks you through exactly what your client sees so you can guide them through it.
Want to send your client the steps directly? Download How to Get Your New Website Live, a five-page guide written for your client. Send it along with the preview link.
How to Get Your New Website Live
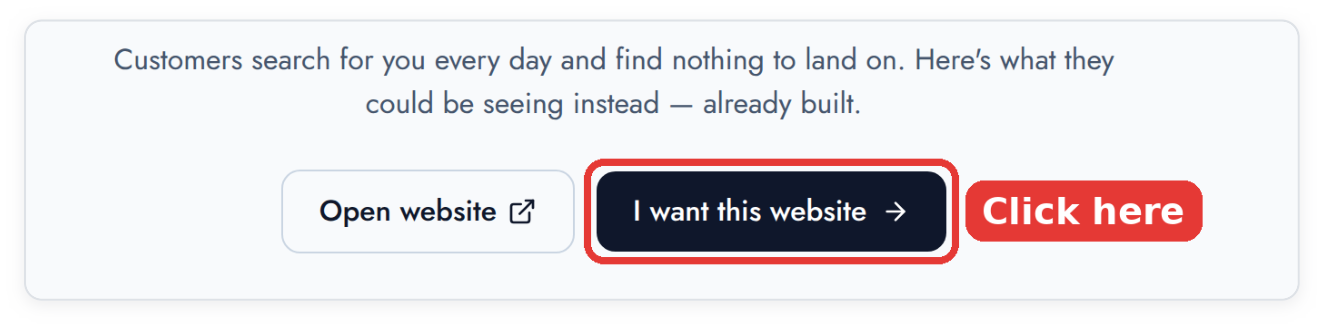
Your client opens the preview link you sent and clicks I want this website. Wix opens in a new tab.
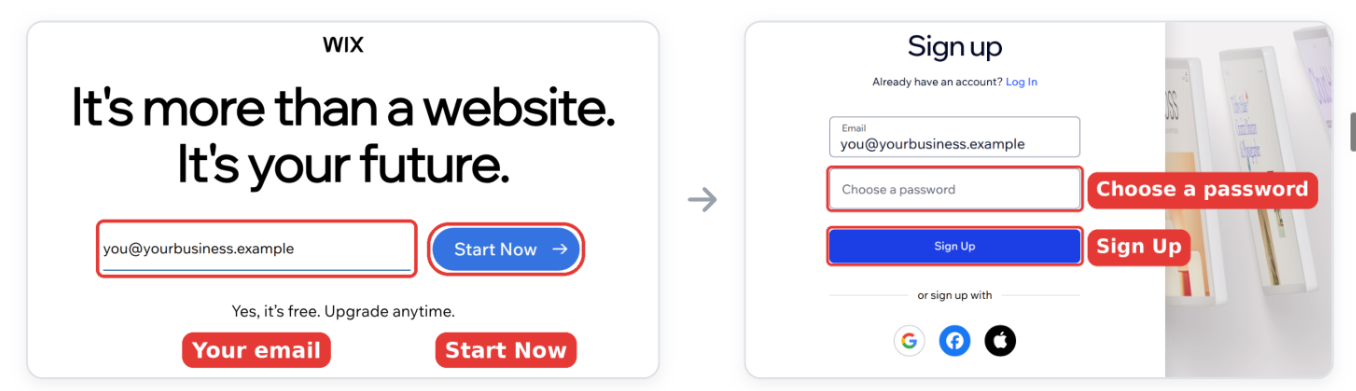
They enter their email and click Start Now, then choose a password and click Sign Up. Signing up with Google, Facebook, or Apple works too.
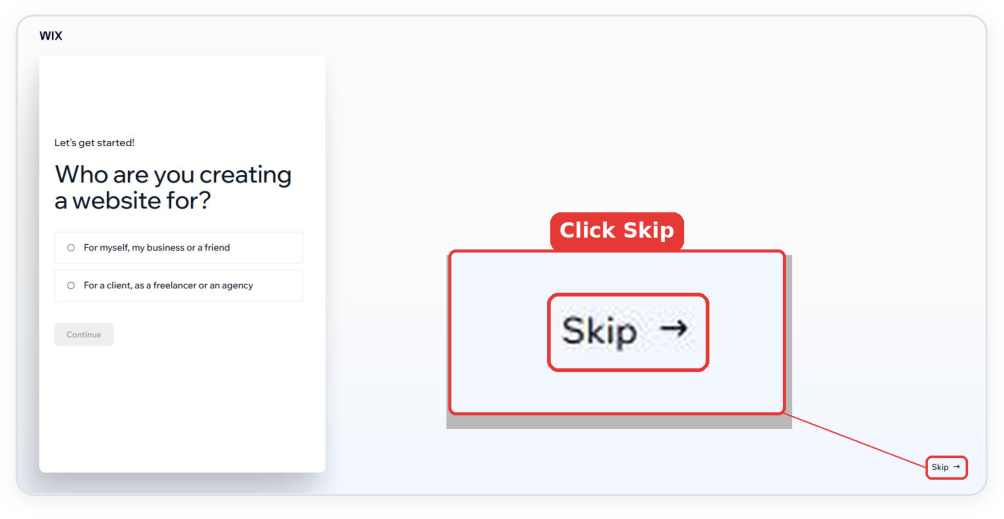
Wix asks a few questions so it can build a site. Since the website is already built, your client clicks Skip on each screen until they reach the Wix dashboard. There are usually three:
Who are you creating a website for? Click Skip in the bottom-right corner.
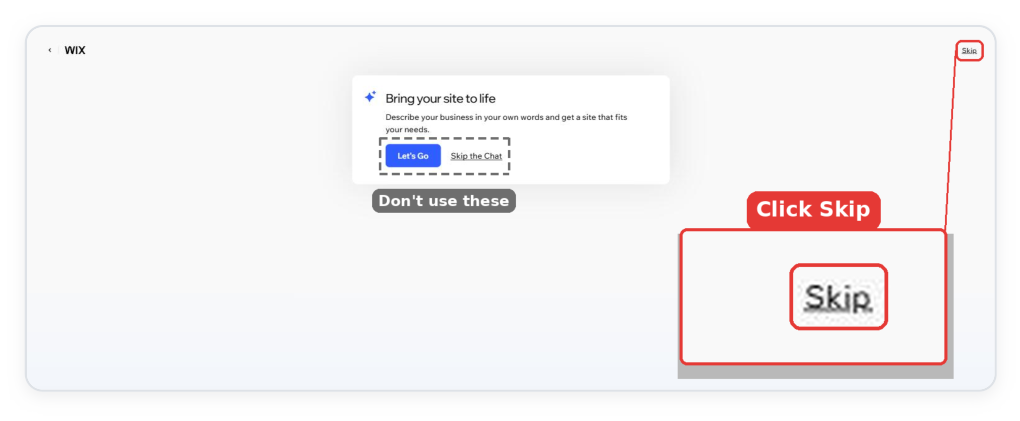
Bring your site to life: Click Skip in the top-right corner. Not Let's Go, which starts Wix's own builder.
Choose a main feature for your site: Click Skip in the bottom-right corner.
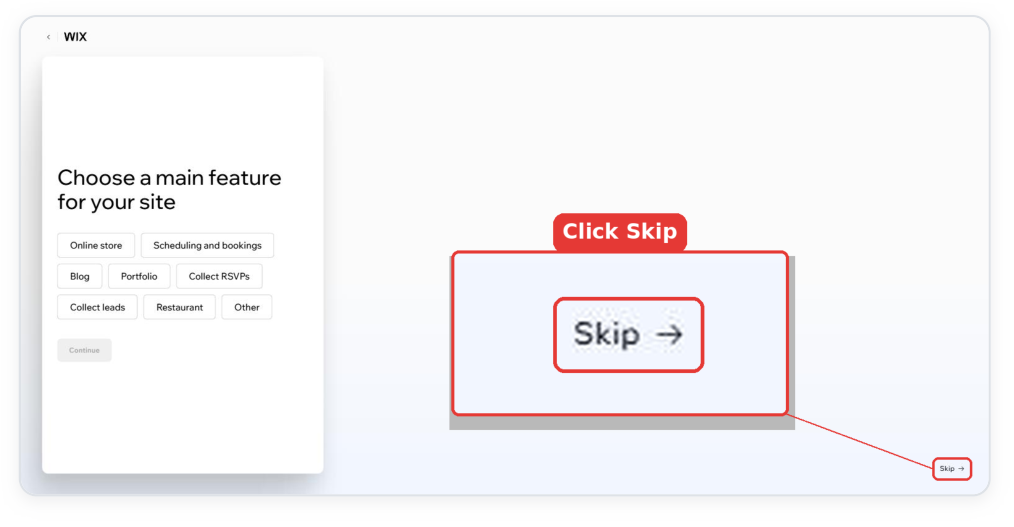
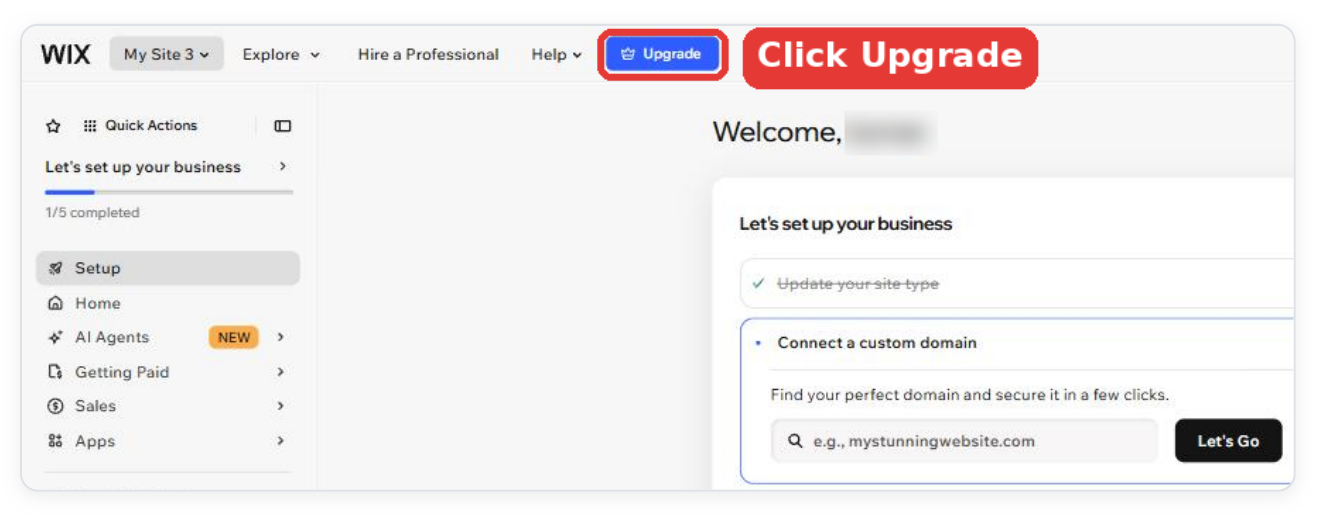
The dashboard shows an empty site named something like "My Site." That is expected; the real website is moved in after payment. Your client clicks Upgrade in the top bar.
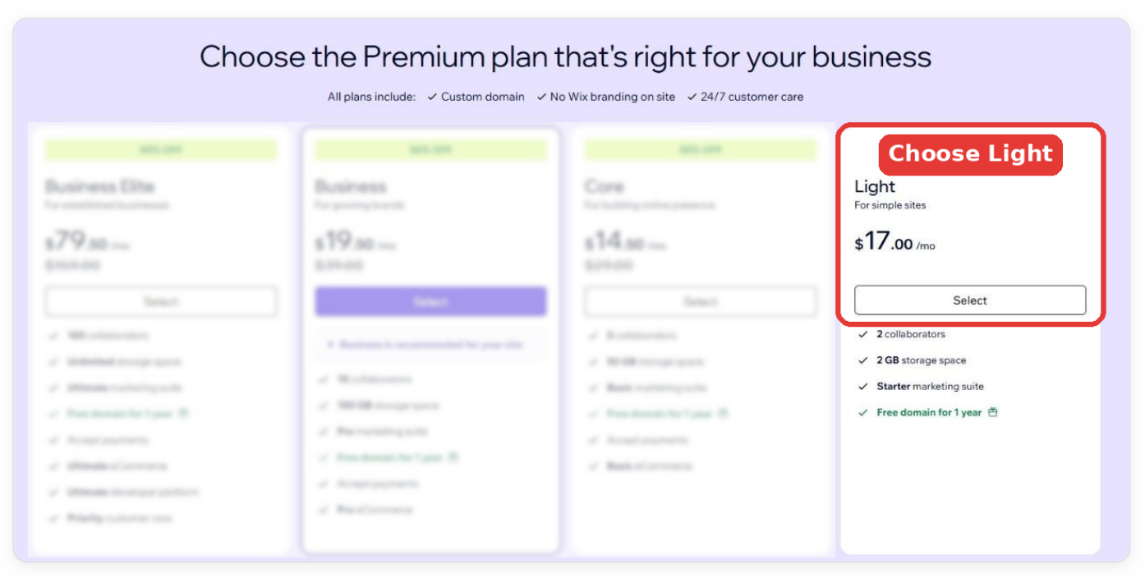
The plans open in a new tab. Under Light, your client clicks Select. Light includes everything the website needs: its own domain, no Wix ads, and a free domain for the first year.
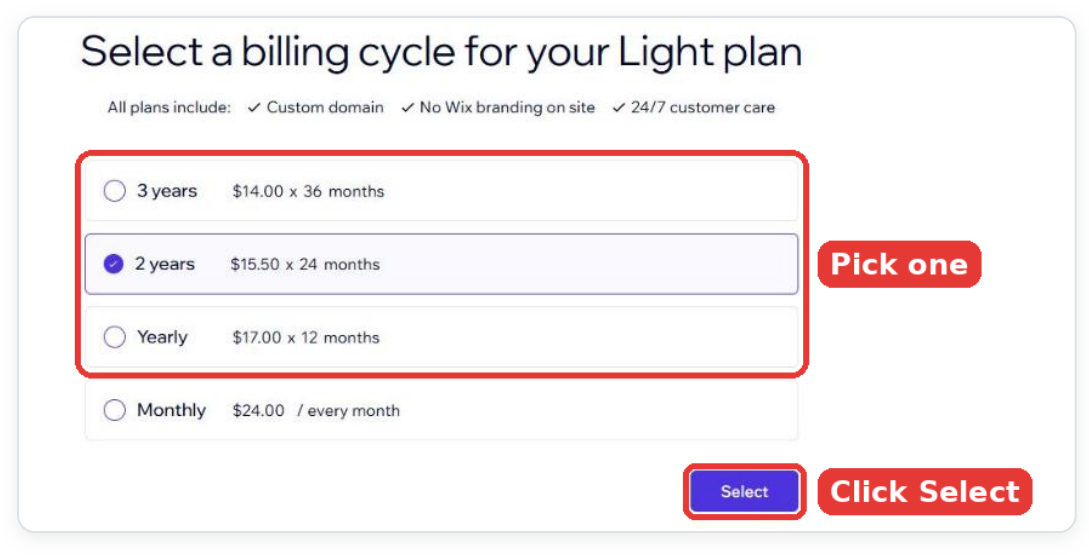
Your client picks Yearly, 2 Years, or 3 Years and clicks Select. Wix pre-selects one, so it is worth checking. Longer plans cost less per month.
At checkout, they confirm the summary says Light and shows the billing period they picked, enter their card details (or use Apple Pay or PayPal) and billing address, and click Submit Purchase.
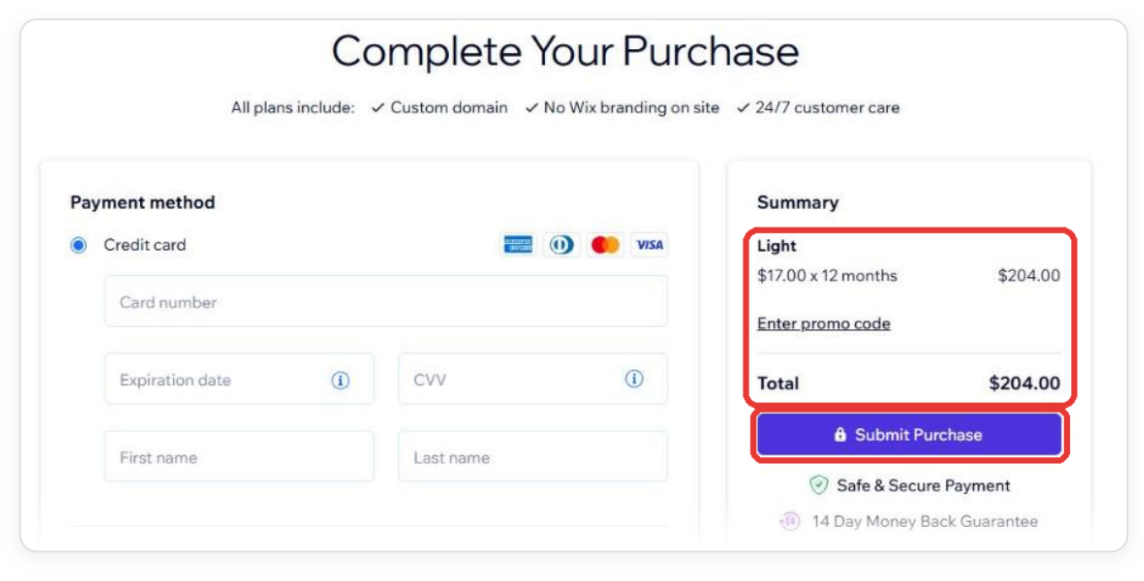
The plan renews automatically at the end of the period. Wix offers a 14-day money-back guarantee.
Buying Wix some other way. Starting from the I want this website button is what connects the purchase to you and to this lead.
Clicking "Let's Go" on the Bring your site to life screen. It starts Wix's own builder, which creates a different site.
Choosing Monthly. Yearly, 2 Years, or 3 Years only.
Choosing a bigger plan. Light is all the website needs, even if another plan shows a discount.
Your client says Wix says they already have an account
They log in. On their Sites page they click Create New Site, skip the setup screens (Step 3), and continue from Step 4.
Wix built a different site, or they clicked Let's Go
No problem; it is only a placeholder. They go to manage.wix.com, open that site, and click Upgrade (Step 4). The real website replaces it later.
They do not see their new website in Wix yet
That is expected. The website is moved into their Wix account after they pay and complete their setup To-Do.
They bought the plan another way, or on another device
Open the lead and click Start free Wix setup (see After the Sale: Your Client's Wix Website, Step 2).
They picked the wrong plan or billing period
Contact support right away. Wix offers a 14-day money-back guarantee.
They are stuck on a step
Walk them through it with this article, or send them the PDF above.
Because your client started from I want this website, you are notified automatically and the website setup begins. Your client then receives:
An invitation to their Customer Hub with a short setup To-Do: business name, phone, address, hours, logo, photos, and their domain. If it is not completed within seven days, setup proceeds with what is available.
An email from Wix to accept the website into their Wix account.
Their domain connected — the exact DNS records to add if they already own a domain, or a link to purchase one on Wix using the same Wix account.
For every step from your side, continue to After the Sale: Your Client's Wix Website.