The Marketing Website section lets you create and configure a professional agency website hosted directly within the Growbotik platform. From here you set your subdomain to get the site live, optionally connect your own custom domain for full white-label branding, and access the website builder to begin customising the site content.
This article covers the two configuration steps — creating your subdomain and connecting a custom domain.
Navigate to Settings in the left navigation of the Agency Hub, then click Marketing website from the sub-navigation list.
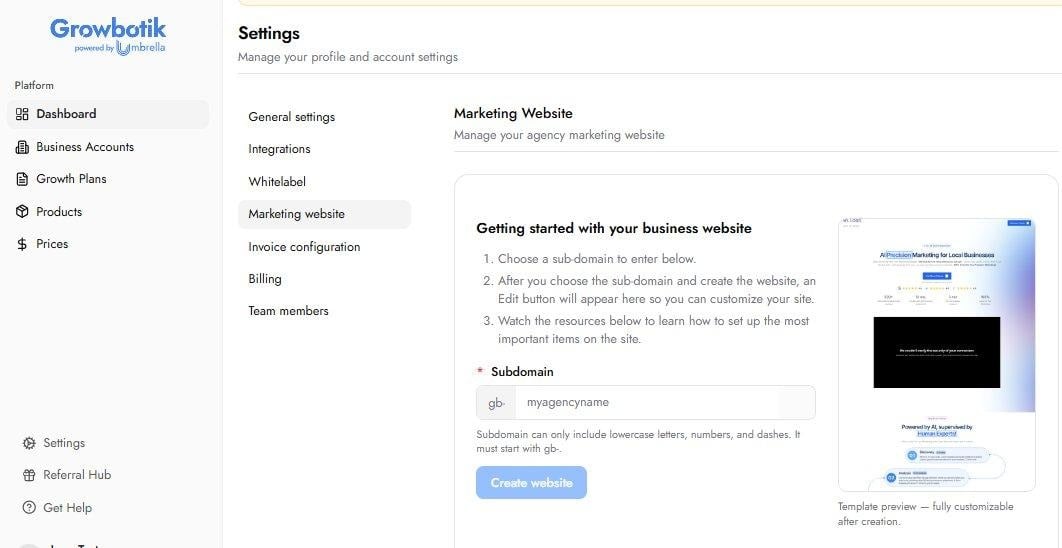
The Marketing Website section — initial state before a subdomain has been created.
The subdomain is for internal use during setup. Once you connect your own custom domain, your site is served under that domain instead and the subdomain address is no longer the primary URL your visitors see.
A subdomain is a unique identifier that determines the web address where your marketing website is temporarily hosted while you are building and configuring it.
In the Subdomain field, type your chosen identifier after the locked gb- prefix. For example: myagency.
Subdomain can only include lowercase letters, numbers, and dashes. It must start with gb-. No spaces or special characters are allowed.
Click Create website.
A confirmation banner appears: Your marketing website has been created. The page now shows your full post-setup options.
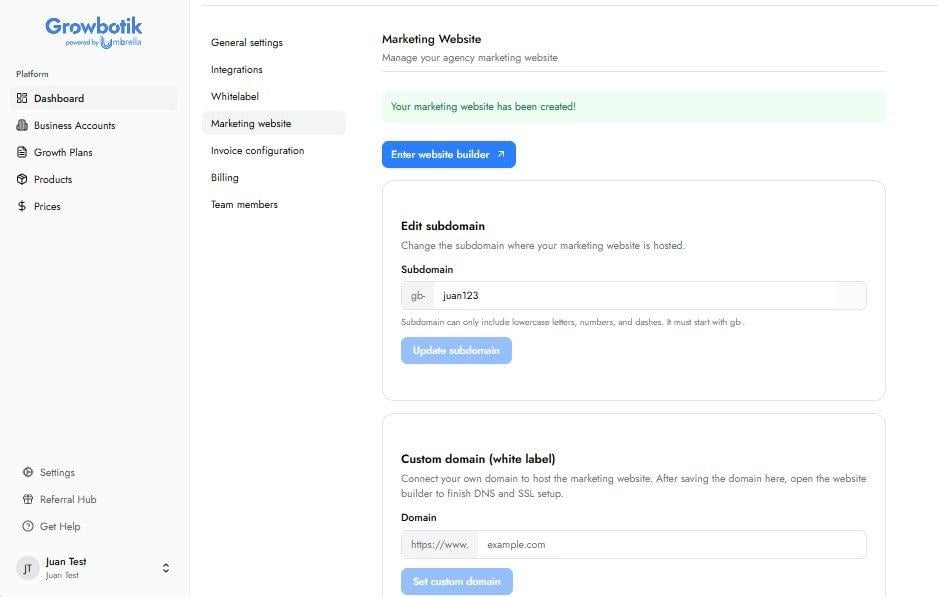
A custom domain allows you to serve your marketing website under your own domain name — for example, youragency.com — rather than the default Growbotik subdomain address. This gives your website a fully branded, professional web presence with no reference to the underlying platform.
Connecting a custom domain requires two actions: entering the domain inside the Agency Hub, and then updating the DNS records at your domain registrar (the service where you purchased your domain, such as GoDaddy, Namecheap, or similar).
On the Marketing Website page, locate the Custom domain (white label) card.
In the Domain field, enter your full domain name — for example, youragency.com.
Click Set custom domain. The domain is saved to your account.
After saving your custom domain in the Agency Hub, log in to your domain registrar and add the following DNS records. These records point your domain to the Growbotik marketing website servers.
Note: Some registrars only allow one A record for the @ host. If your registrar does not allow two A records, consult their support documentation on how to add multiple IP addresses to a single A record, or contact their support team directly.
DNS changes do not take effect immediately. After updating your records, allow anywhere from a few minutes up to 48 hours for the changes to propagate fully across the internet. During this window your domain may not yet resolve to your marketing website — this is normal.
Once your subdomain is created, a blue Enter website builder button appears at the top of the Marketing Website page. Clicking this button opens the website builder where you can customise your site content, manage pages, and publish your site.
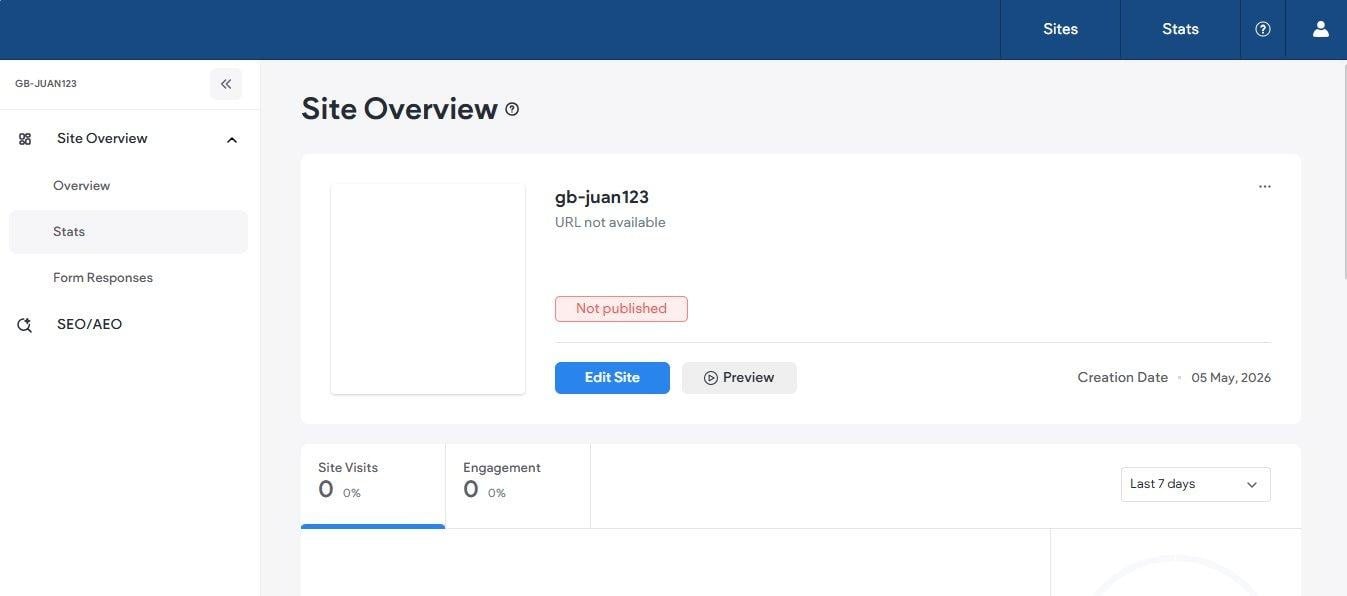
The website builder — Site Overview showing your site name, publish status, and editing options.
The website builder opens to the Site Overview screen, which shows your site name, current publish status, and options to Edit Site or Preview. Your site is not publicly visible until you publish it.
Yes. The Edit subdomain card on the Marketing Website page allows you to update your subdomain at any time. Enter a new value and click Update subdomain. The same formatting rules apply.
DNS propagation can take anywhere from a few minutes to 48 hours depending on your registrar and the global DNS network. If your domain is not resolving after 48 hours, verify your DNS records are entered correctly and contact your registrar if needed.
Some registrars limit the number of A records for a single host. If this is the case, consult your registrar's support documentation for instructions on how to add multiple IP addresses to a single A record, or contact their support team. Both IP addresses are required for redundancy and load balancing.
Once you have updated your DNS records at your registrar and published your website from the website builder, the SSL certificate is configured automatically. No additional steps are required on your end.
No. Your website is created but not publicly visible until you publish it from the website builder. The Site Overview screen in the builder shows a Not published status until you publish for the first time.