Overview
Set up your professional brand presence in Growbotik by configuring your agency name, logo, and invoice details.
Part 1: General Settings
Step 1: Click Settings in the bottom left corner of your dashboard.
Step 2: Enter your agency name.
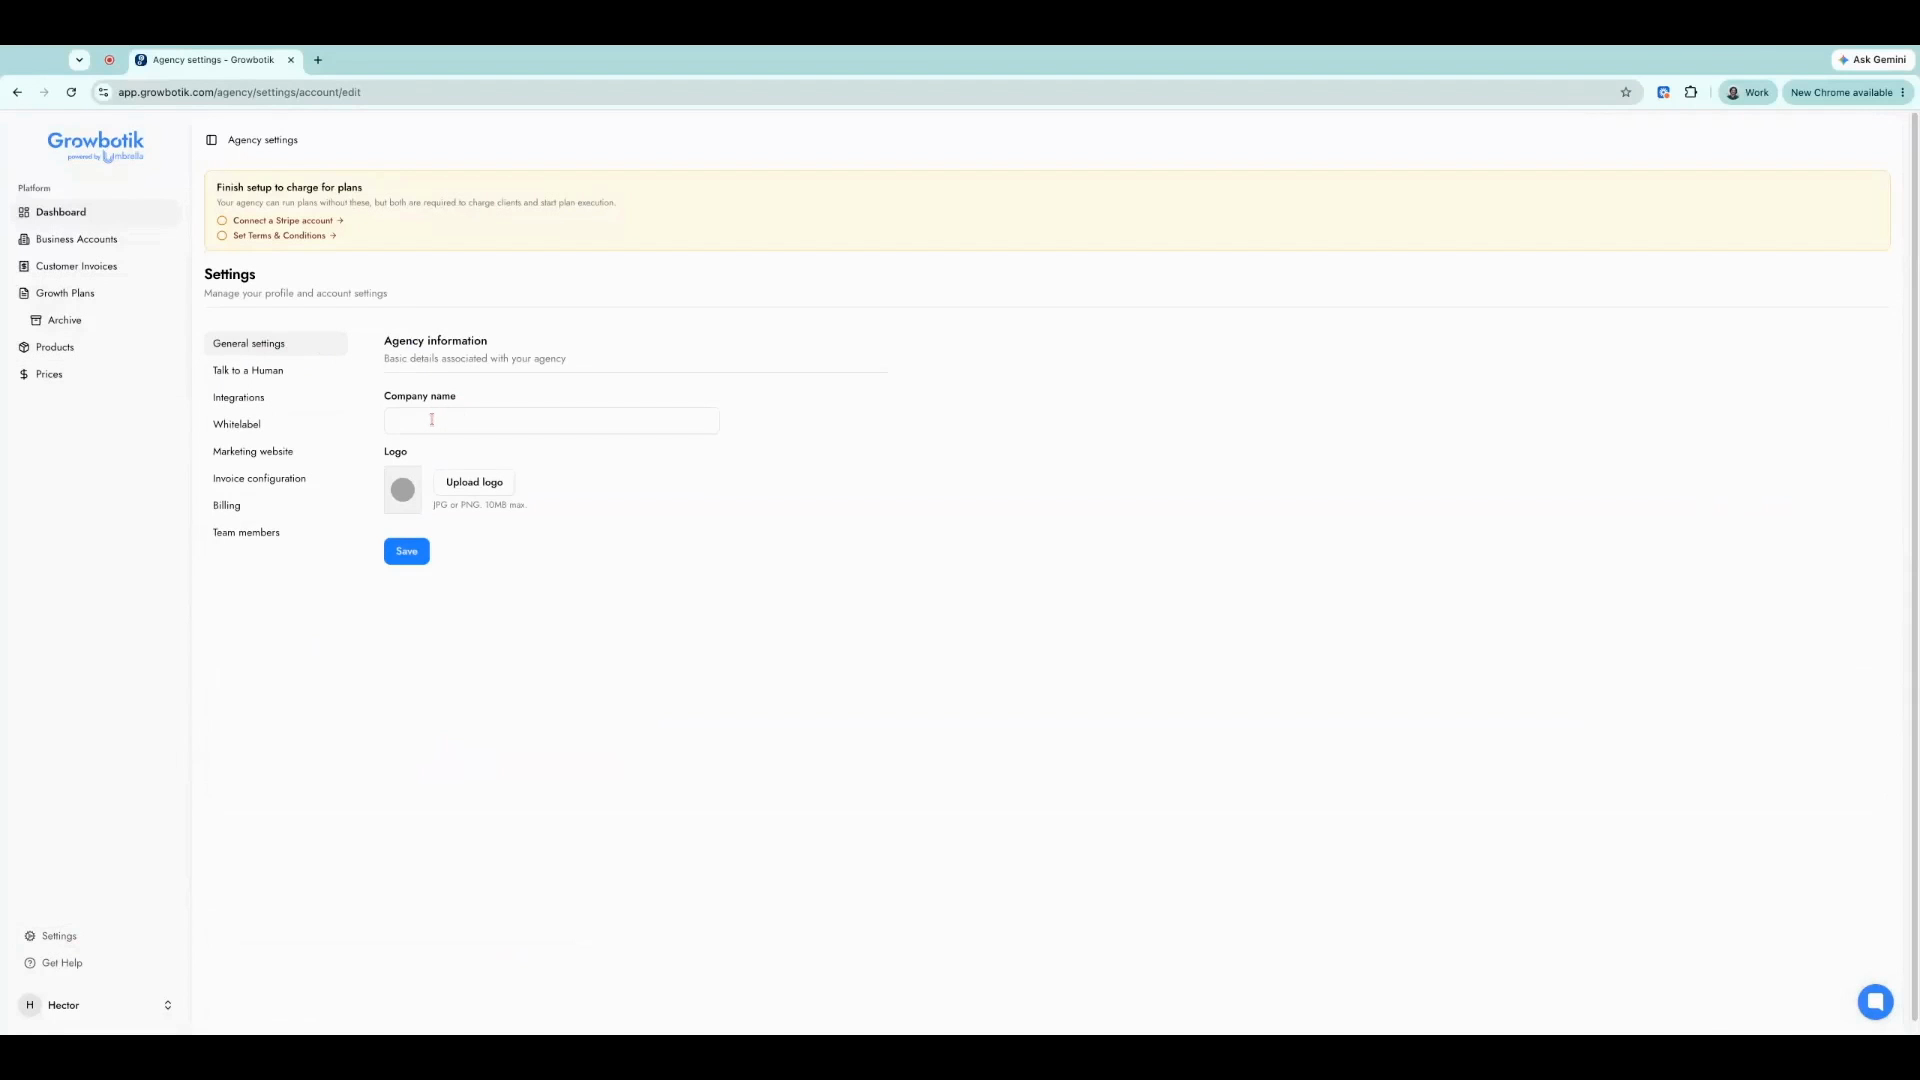
Step 3: Click under the Logo section to upload your logo. Accepted formats are JPG and PNG.
Step 4: Click Save to apply your changes.
Part Two — Invoice configuration
Step 1: From Settings, select Invoice Configuration.
Step 2: Upload the logo you want displayed on invoices by clicking Upload Logo and selecting the image from your computer.
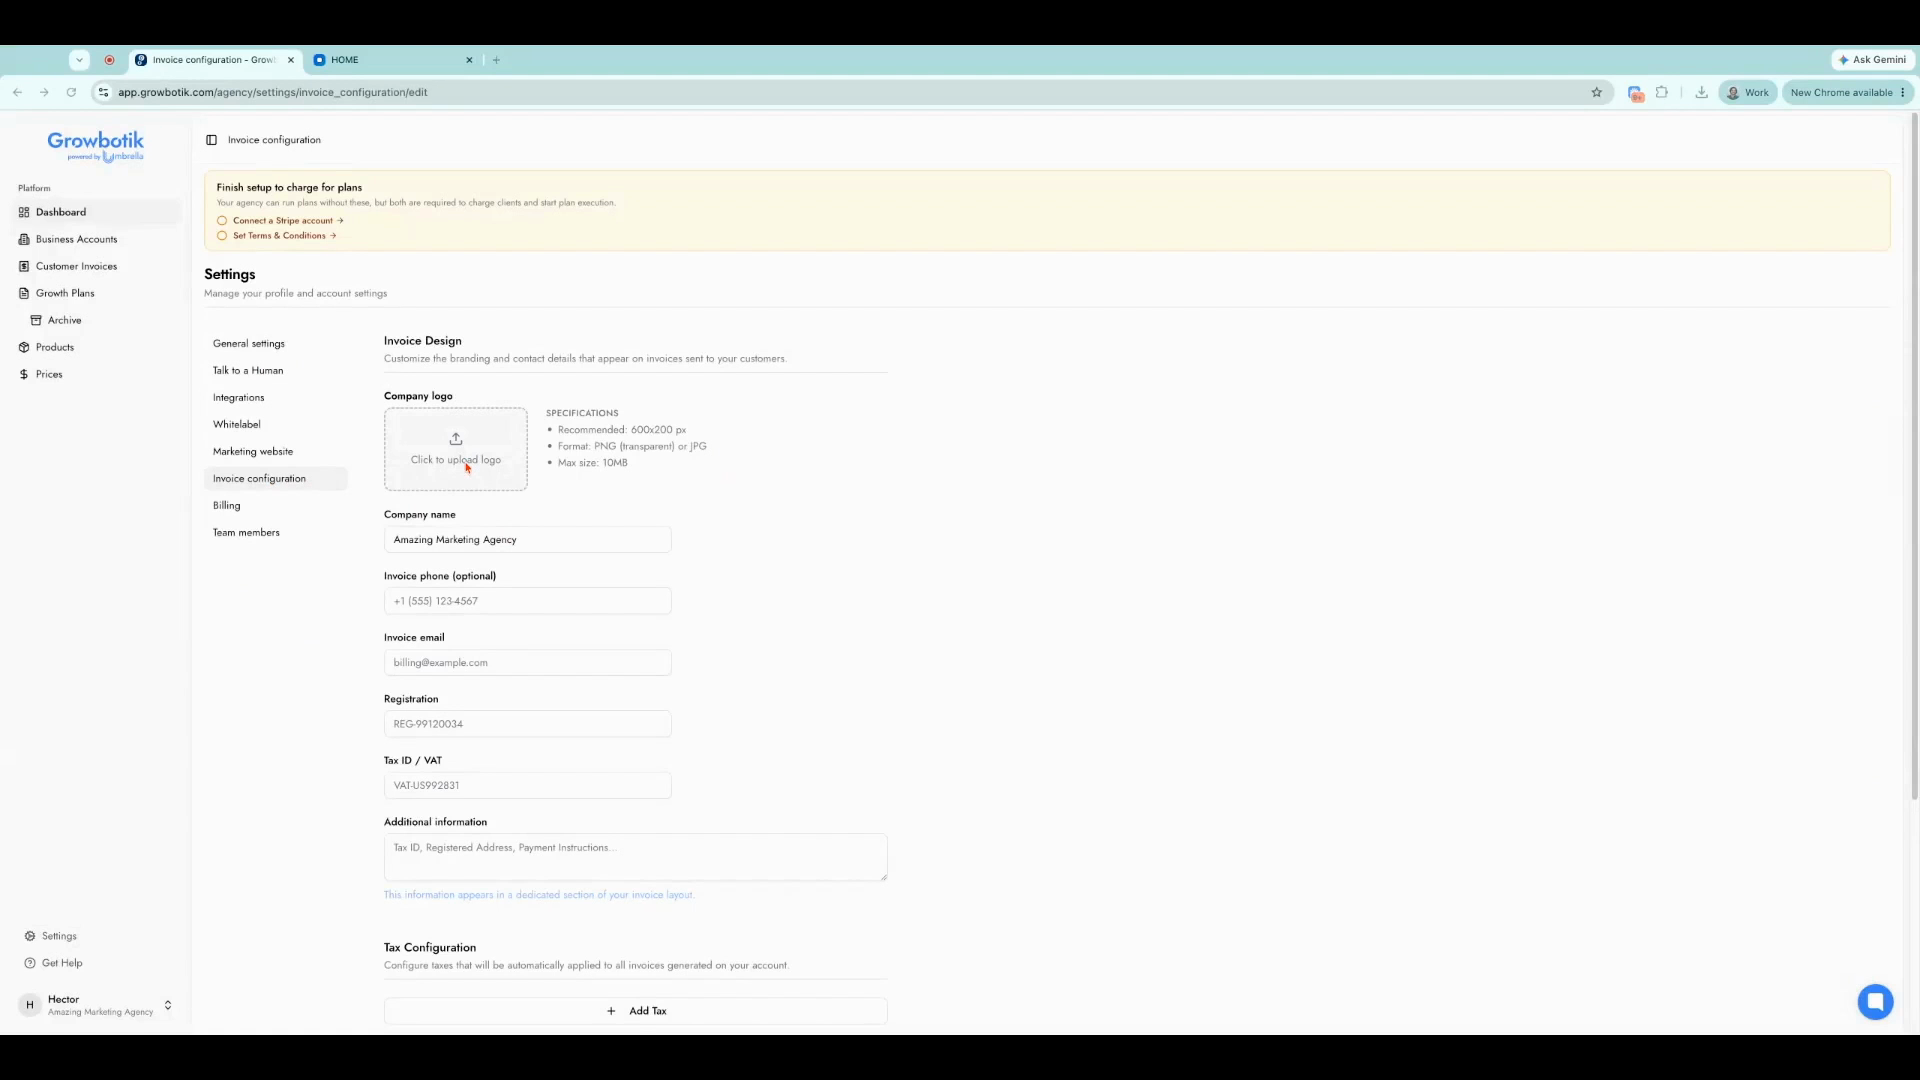
Step 3: Review your agency name. It pulls from General Settings but can be edited if needed.
Step 4: Enter an invoice phone number. Optional — helpful for clients who need to call for support.
Step 5: Add your invoice email address.
Step 6: Enter your registration number, if applicable.
Step 7: Add your tax ID number, if required.
Step 8: Enter any additional information for invoices, such as a registered address or payment instructions.
Step 9: To set up taxes, click Add Tax, enter the tax name, and set the percentage. Click Add Tax again to add additional taxes as needed.
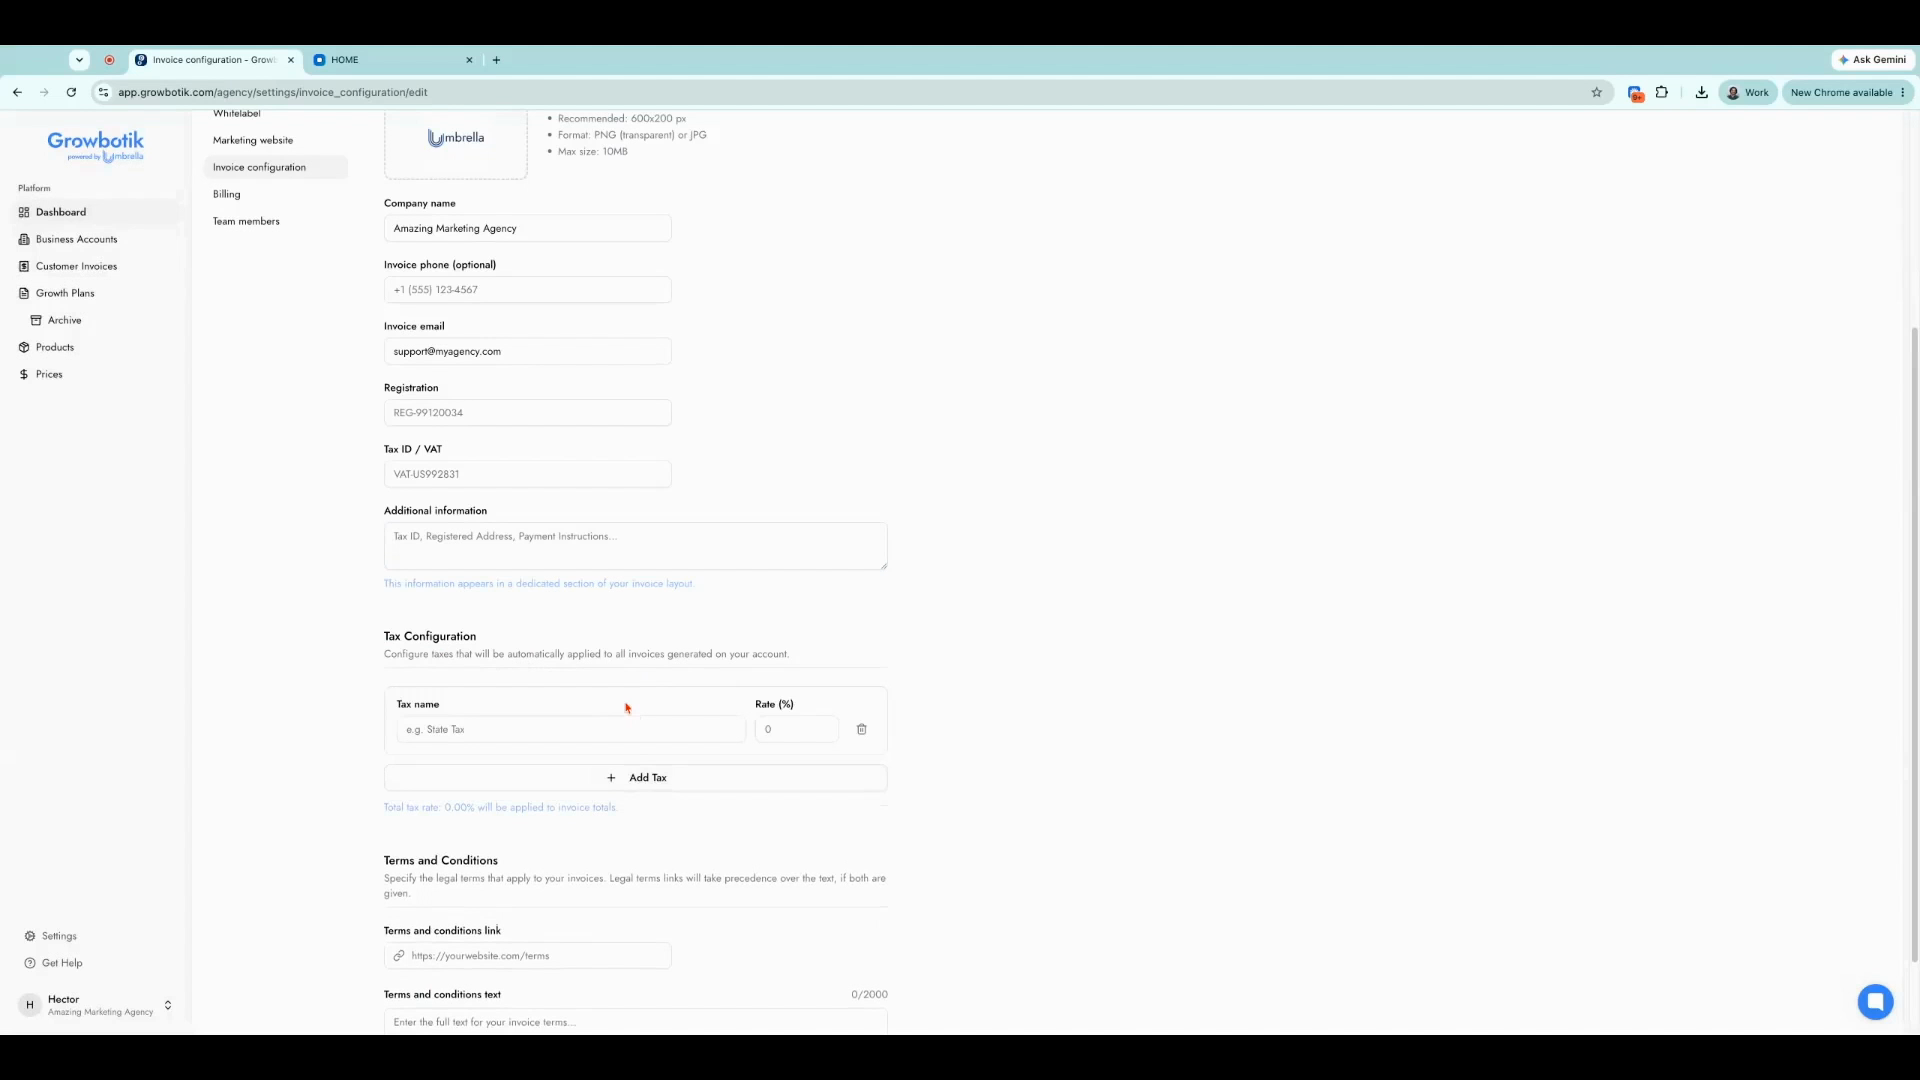
Step 10: Add your Terms and Conditions. You can enter a link, the full text, or both. To find your Terms and Conditions link, visit your agency website, scroll to the footer, click Terms of Service, and copy the URL. Paste it into the designated field.
Note: To find your Terms and Conditions link, visit your agency website, scroll to the footer, click Terms of Service, and copy the URL.
Step 11: Return to the Invoice Configuration and paste the URL. Click Save to finalize. Your branding — including logo, agency name, and invoice details — will appear on your invoices exactly as configured.