Pricing groups let you control your profit margins by setting specific markups for different clients or service plans. This guide covers how to create and adjust pricing groups, set default and per-product markups, and use those groups when sharing assessment and plan links.
When your client pays, Stripe splits the payment right away: the wholesale part goes to Growbotik, and your markup goes to your Stripe account. Refunds work the same way, in reverse.
Step 1: From your Growbotik dashboard, select Prices from the left navigation.
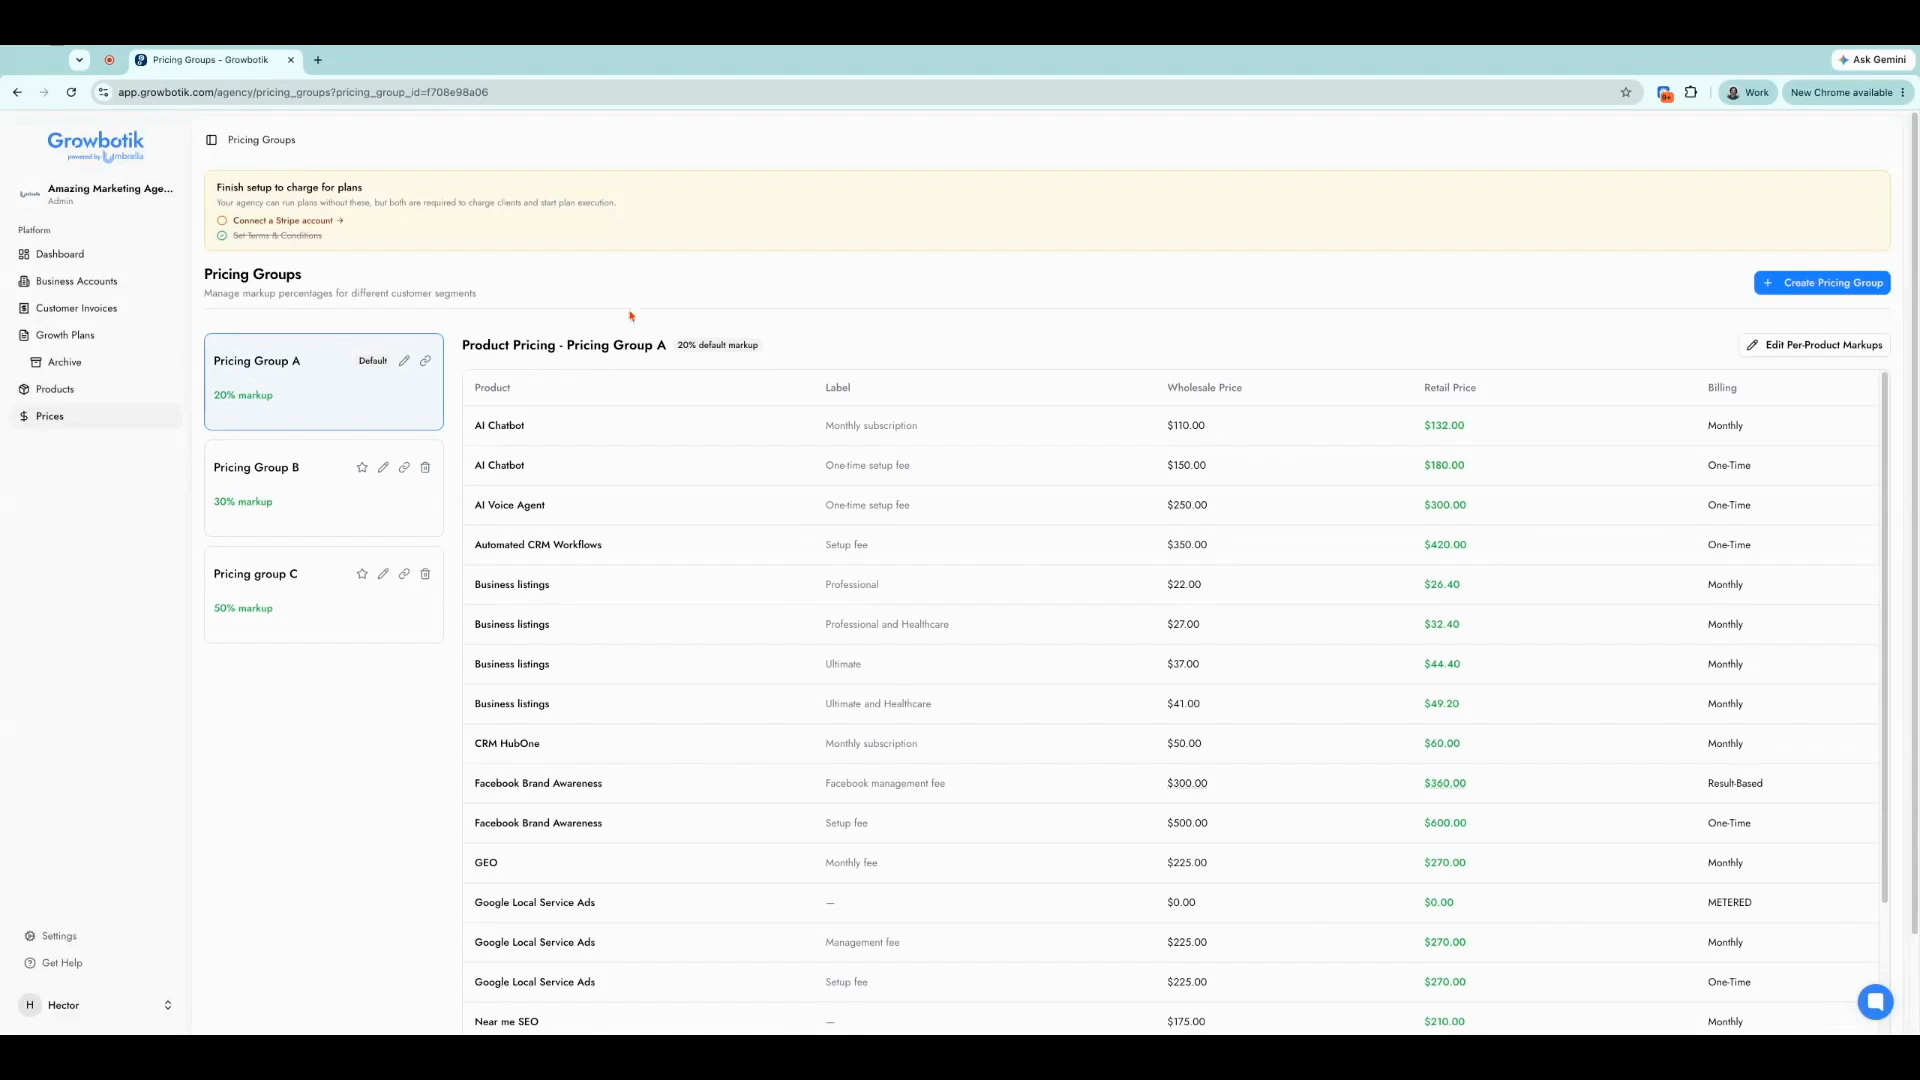
Step 2: View your existing pricing groups in the panel on the left.
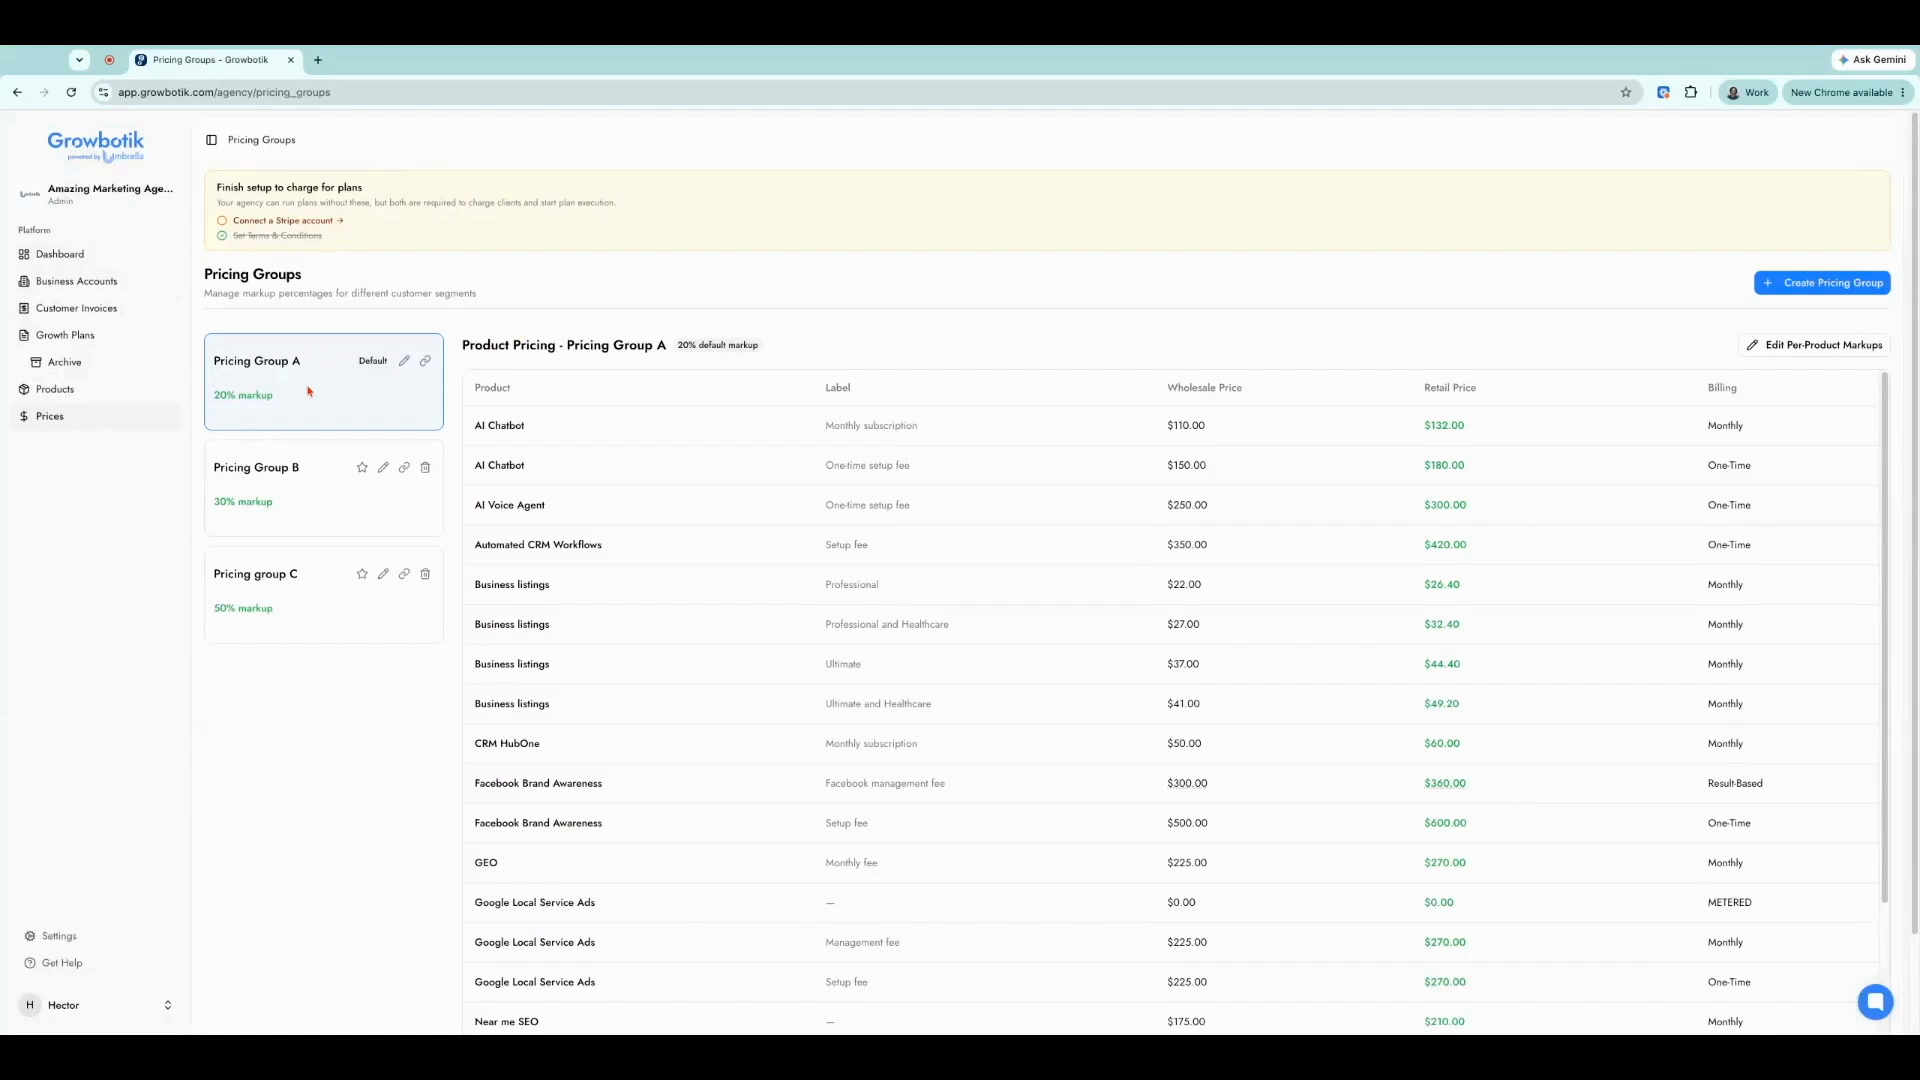
Step 3: Copy a pricing group's plan link by clicking the link icon next to the relevant group. Use this link when sending an assessment to a client or when creating a plan.
Step 4: When the client uses this link to access the Discovery Chat, Gap Analysis, and 12-Month Growth Plan, the prices and markups from the selected pricing group are applied automatically.
Each group's markup percentage is displayed below the group name. To charge a different markup, select a different pricing group and copy its plan link instead.
By default, you will have one pricing group. You can create additional groups to suit different clients or scenarios.
Step 1: Click the Create Pricing Group button in the top right.
Step 2: Name your pricing group. Optionally, add a description to keep things organized.
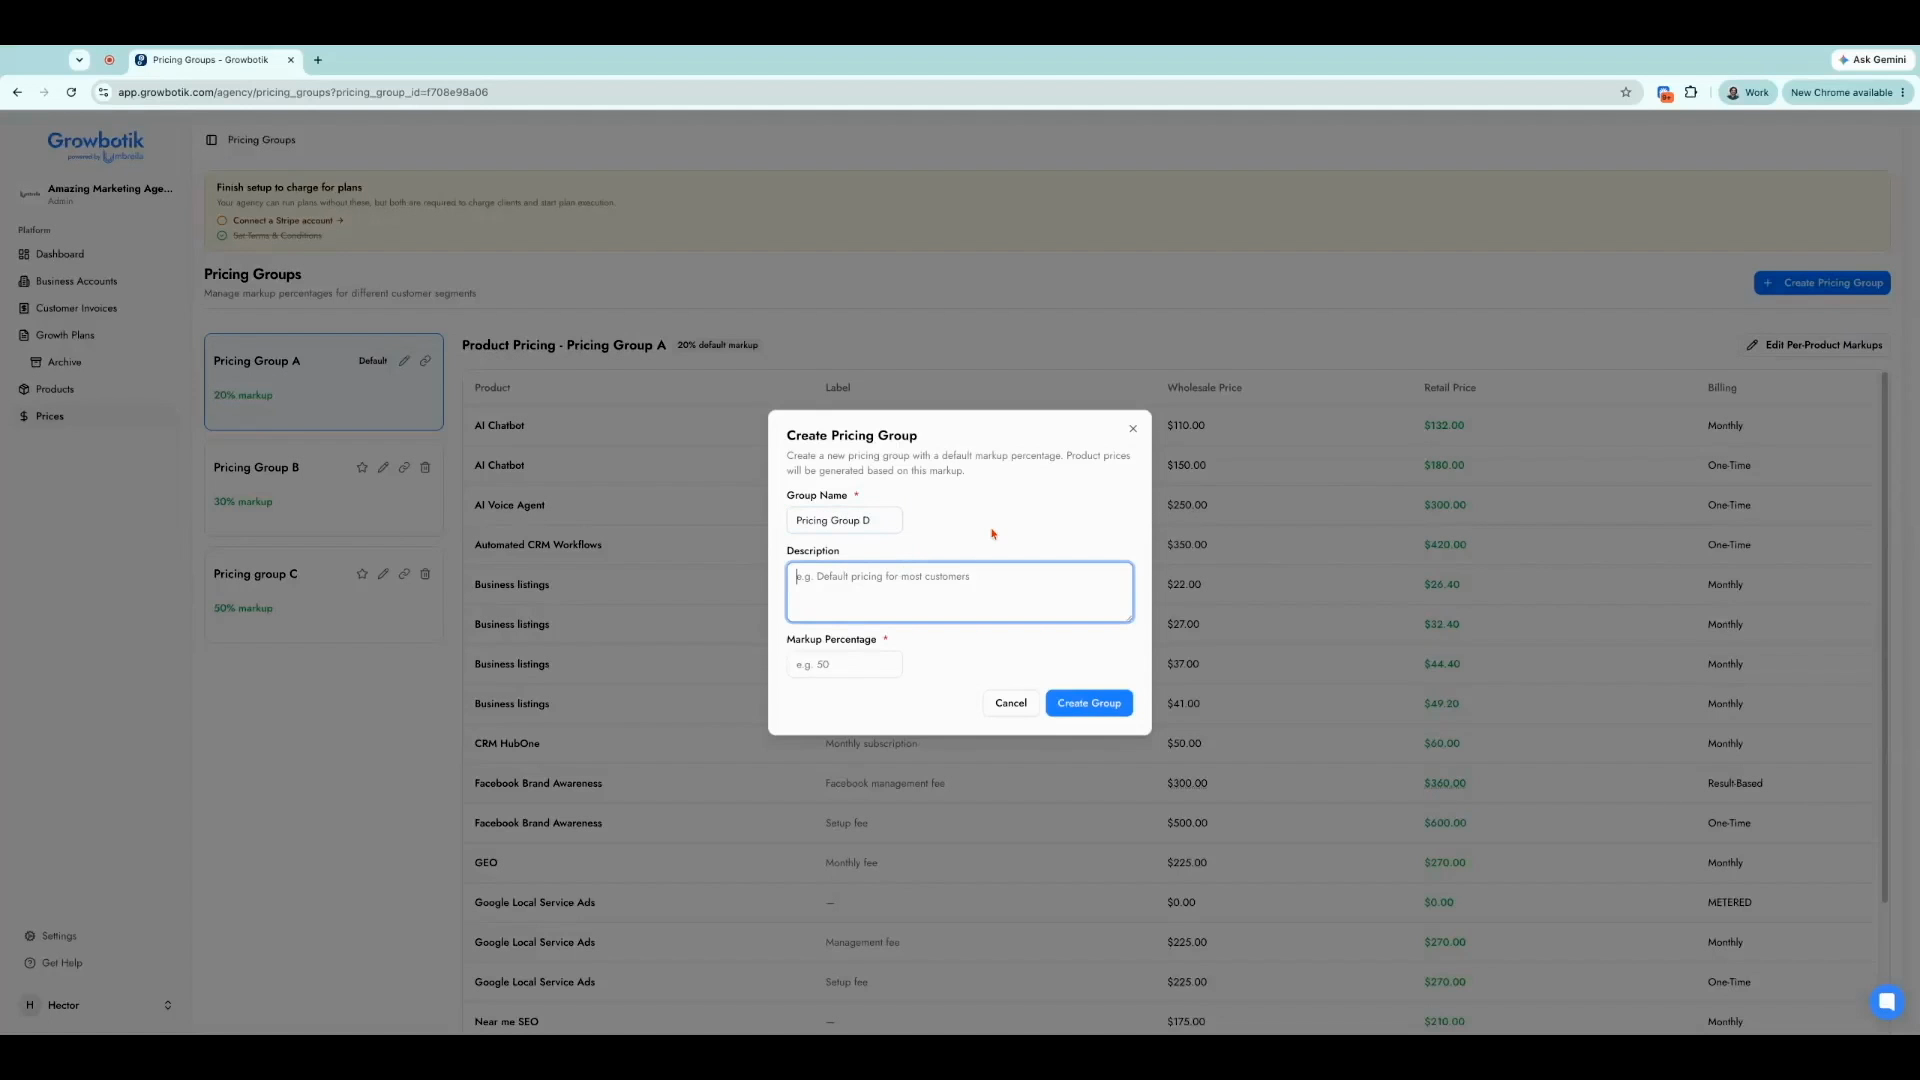
Step 3: Set a markup percentage. This applies to all products in the group.
Step 4: Click Create Group to save.
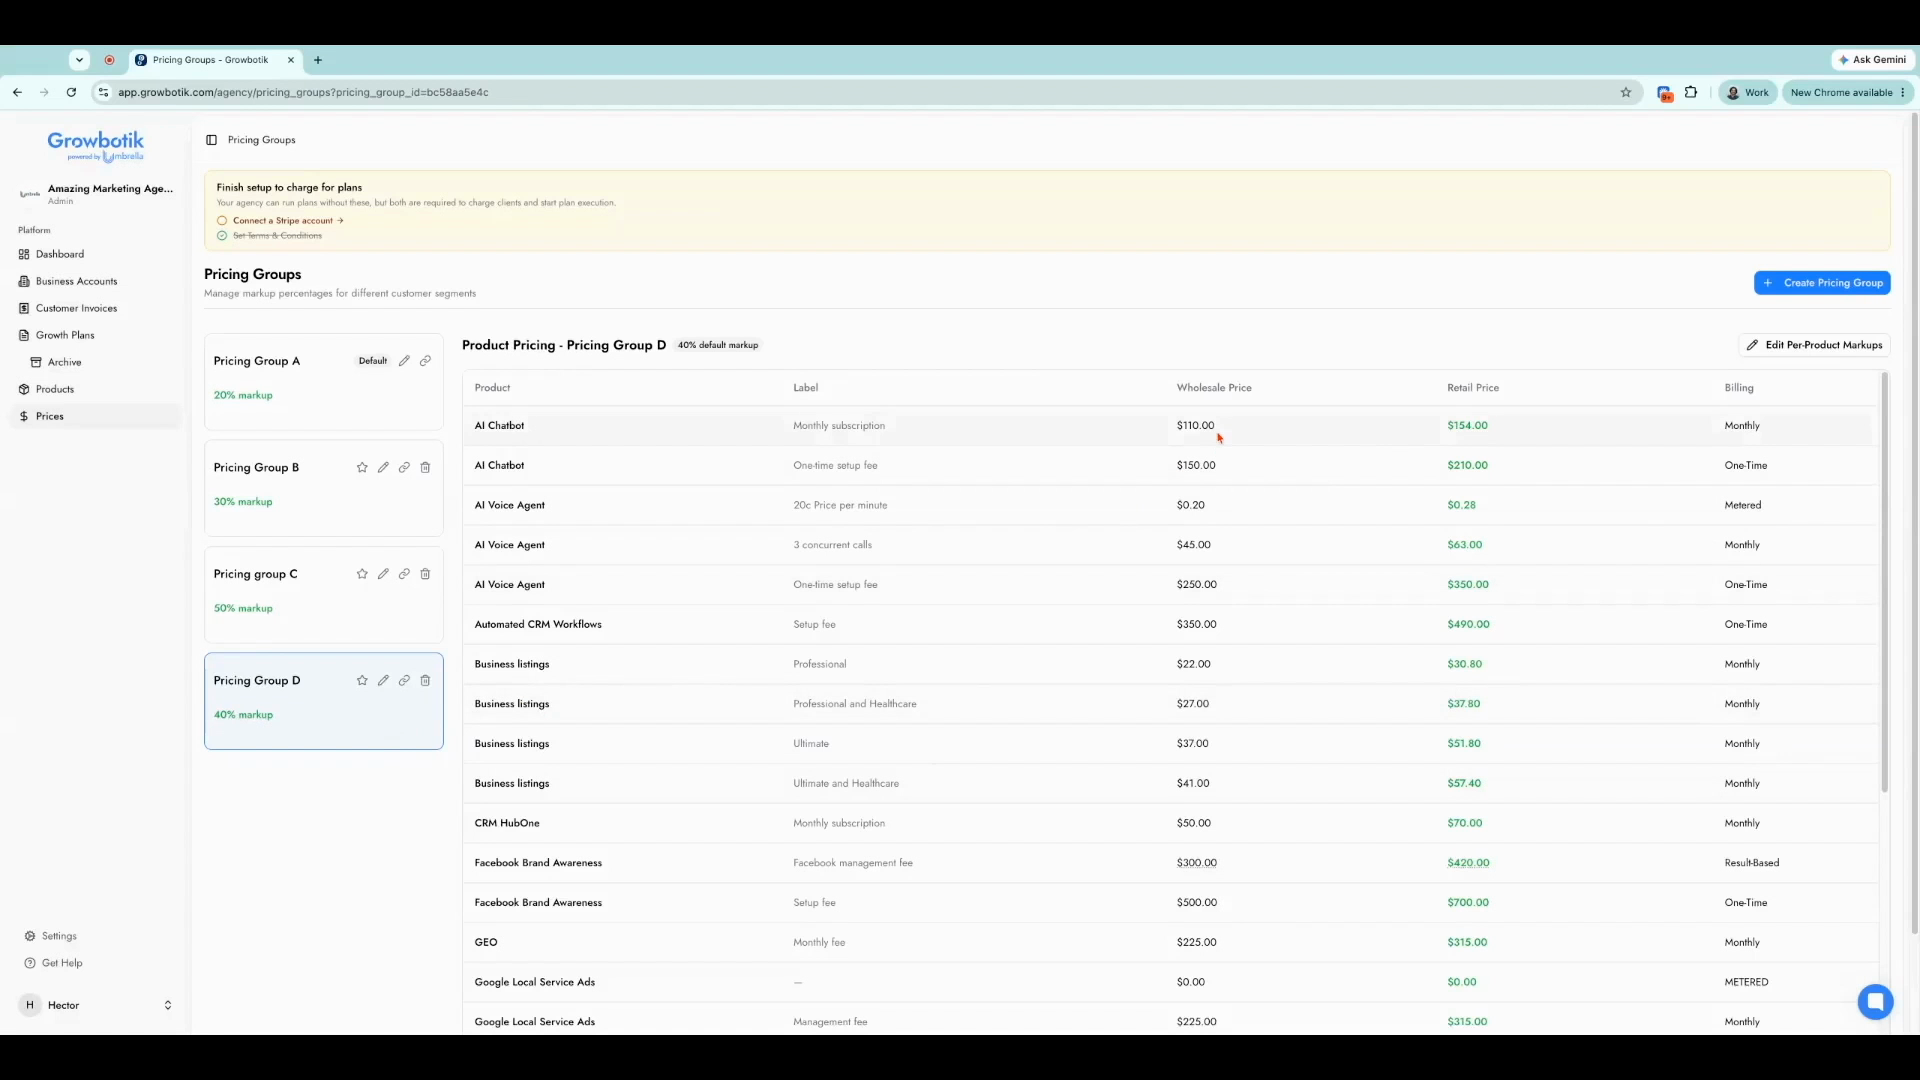
The new group appears in the Pricing Groups section with the chosen markup applied across all products. When you select a pricing group, each product's wholesale price and retail price (including your markup) are displayed.
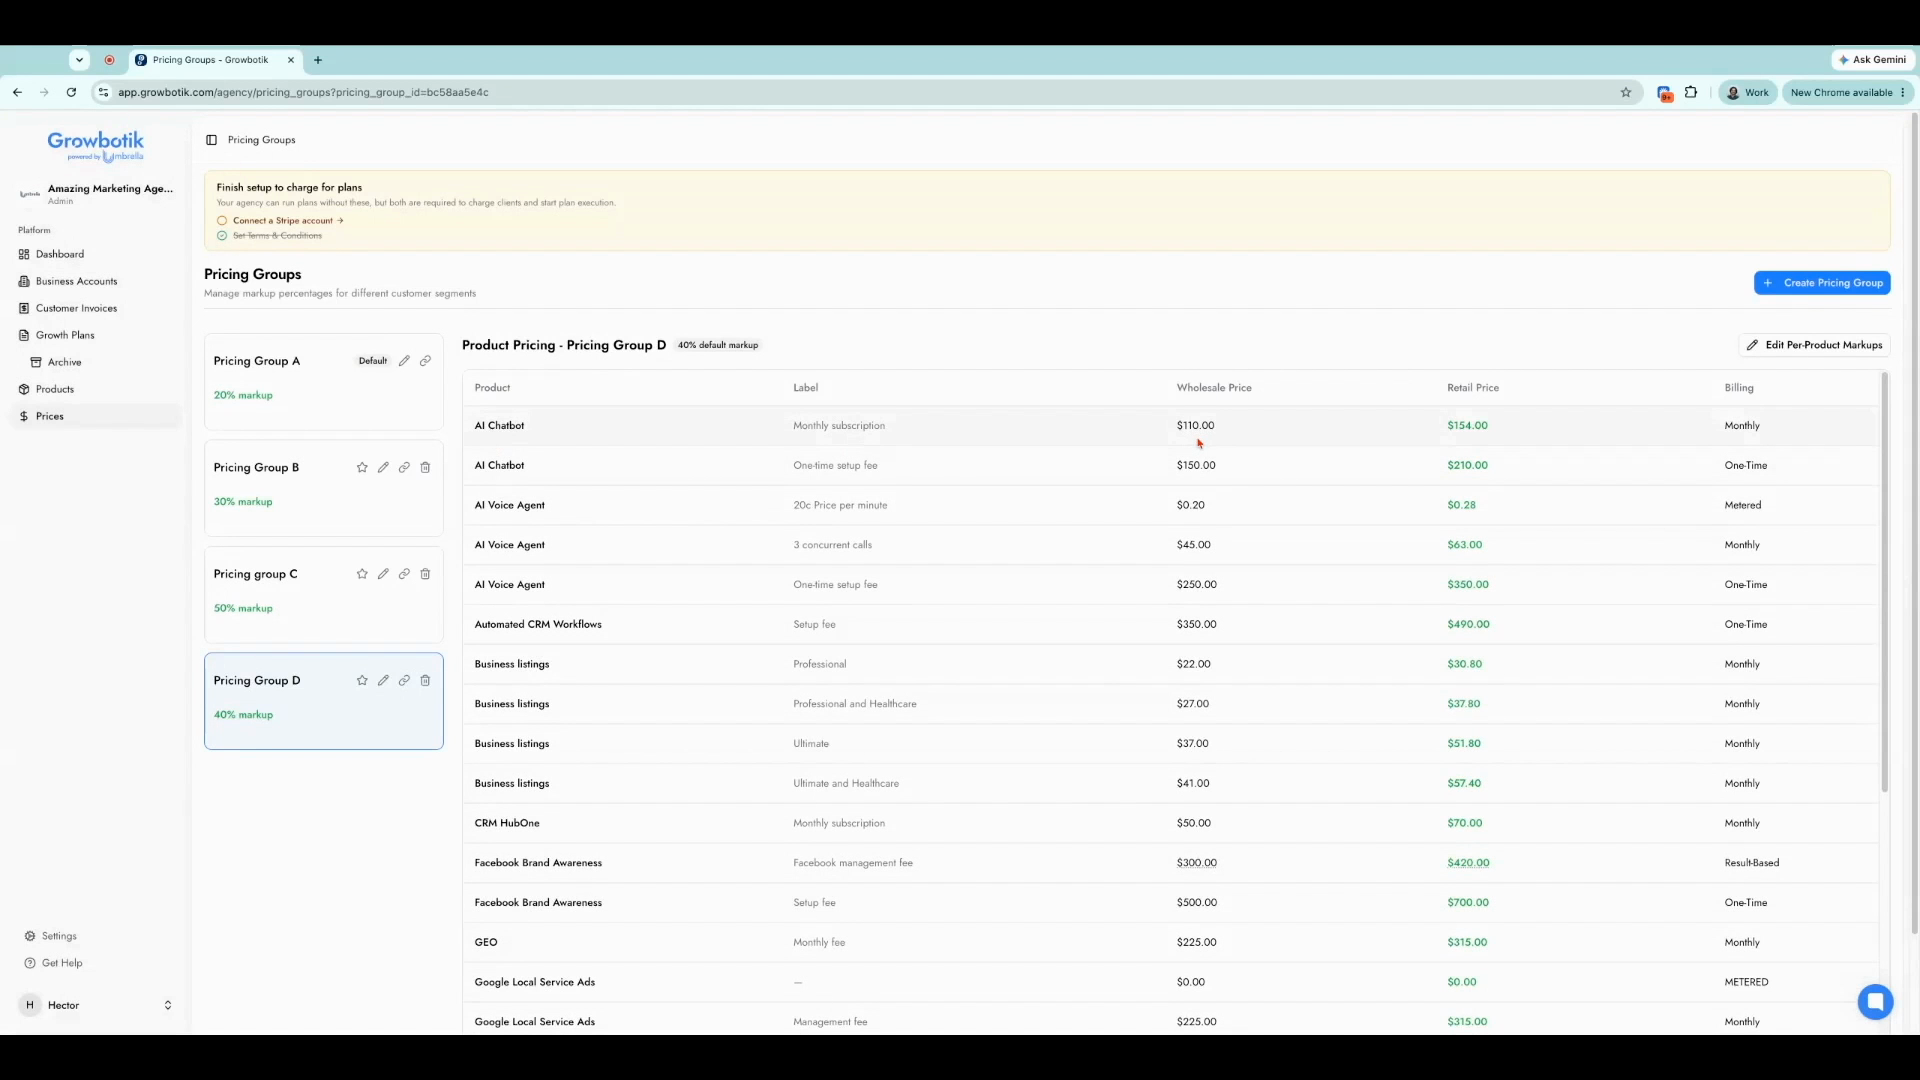
Step 5: If you want custom markups for individual products instead of a universal percentage, click the Edit Per-Product Markups button below the Create Pricing Group button.
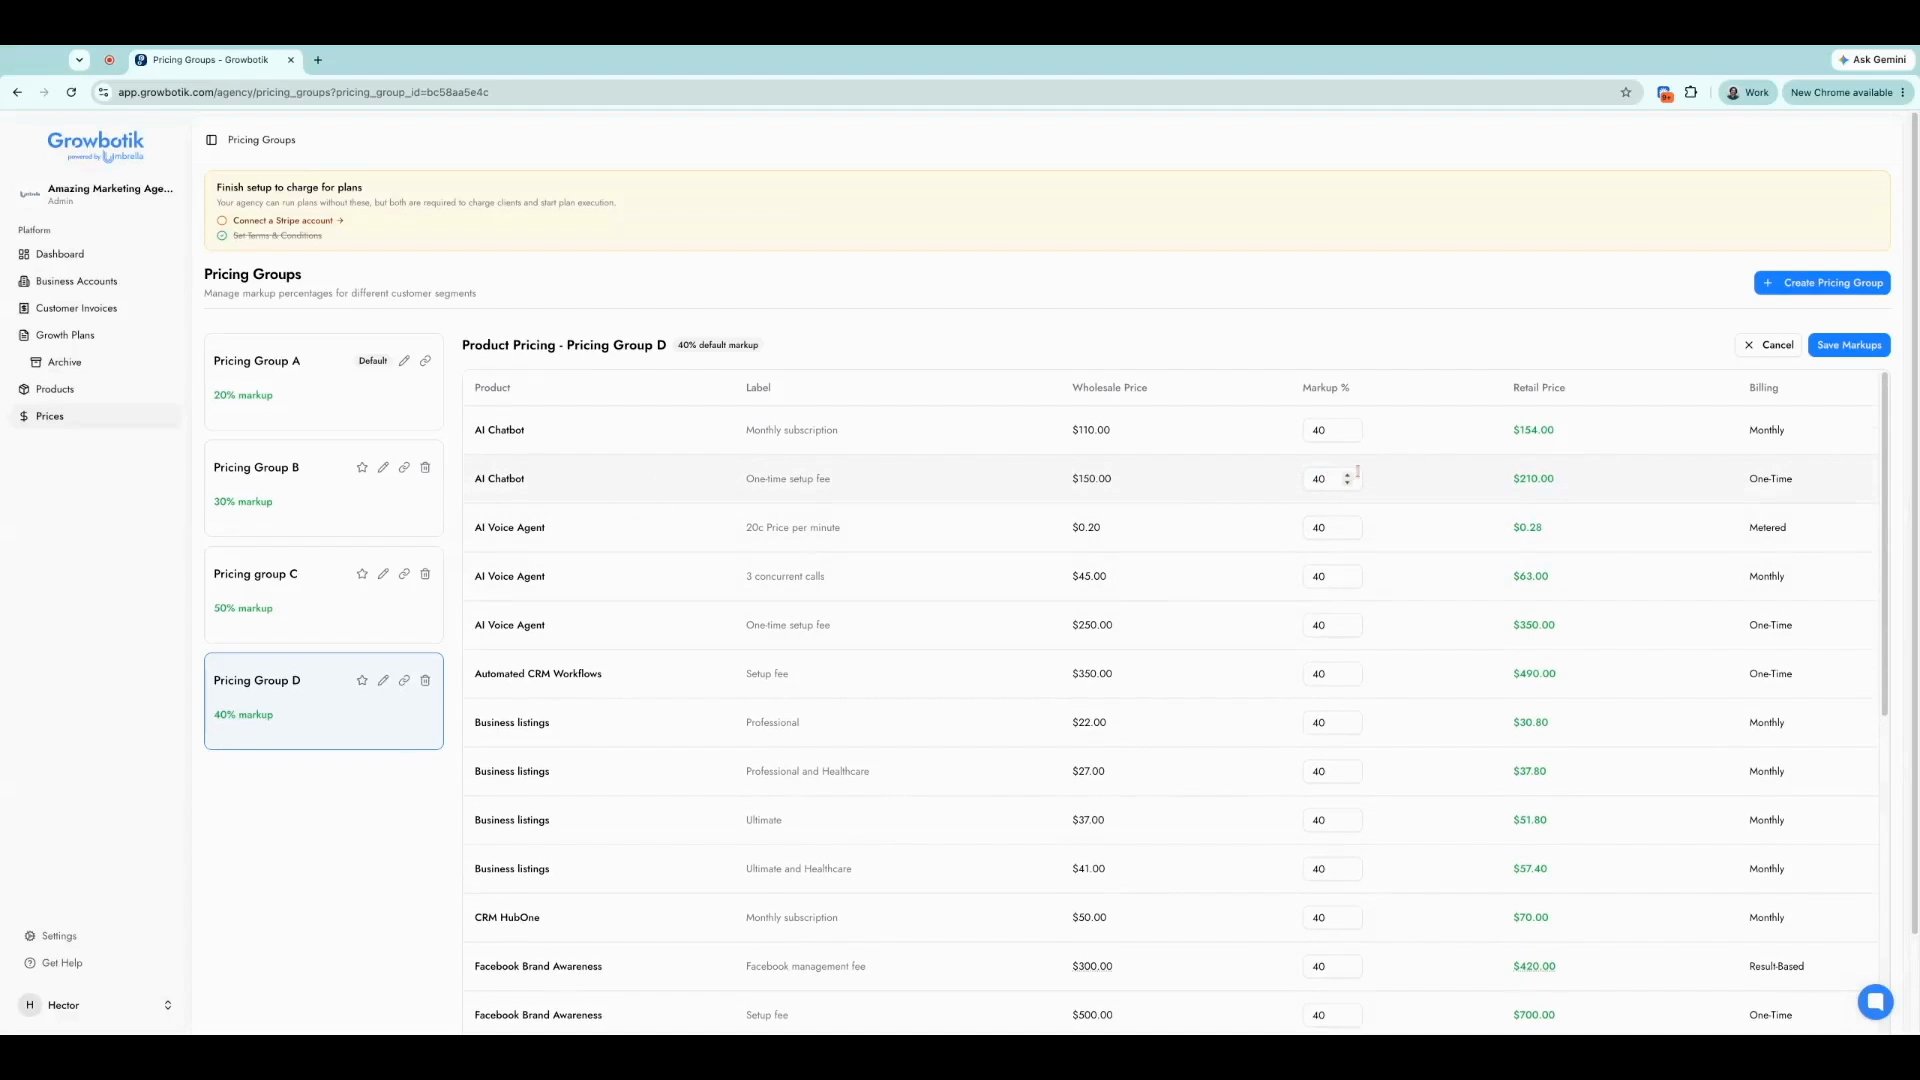
Step 6: Update the markup for any product by entering a new percentage next to it. You can set different markups for different charge types — for example, a higher markup for setup fees than for monthly subscriptions.
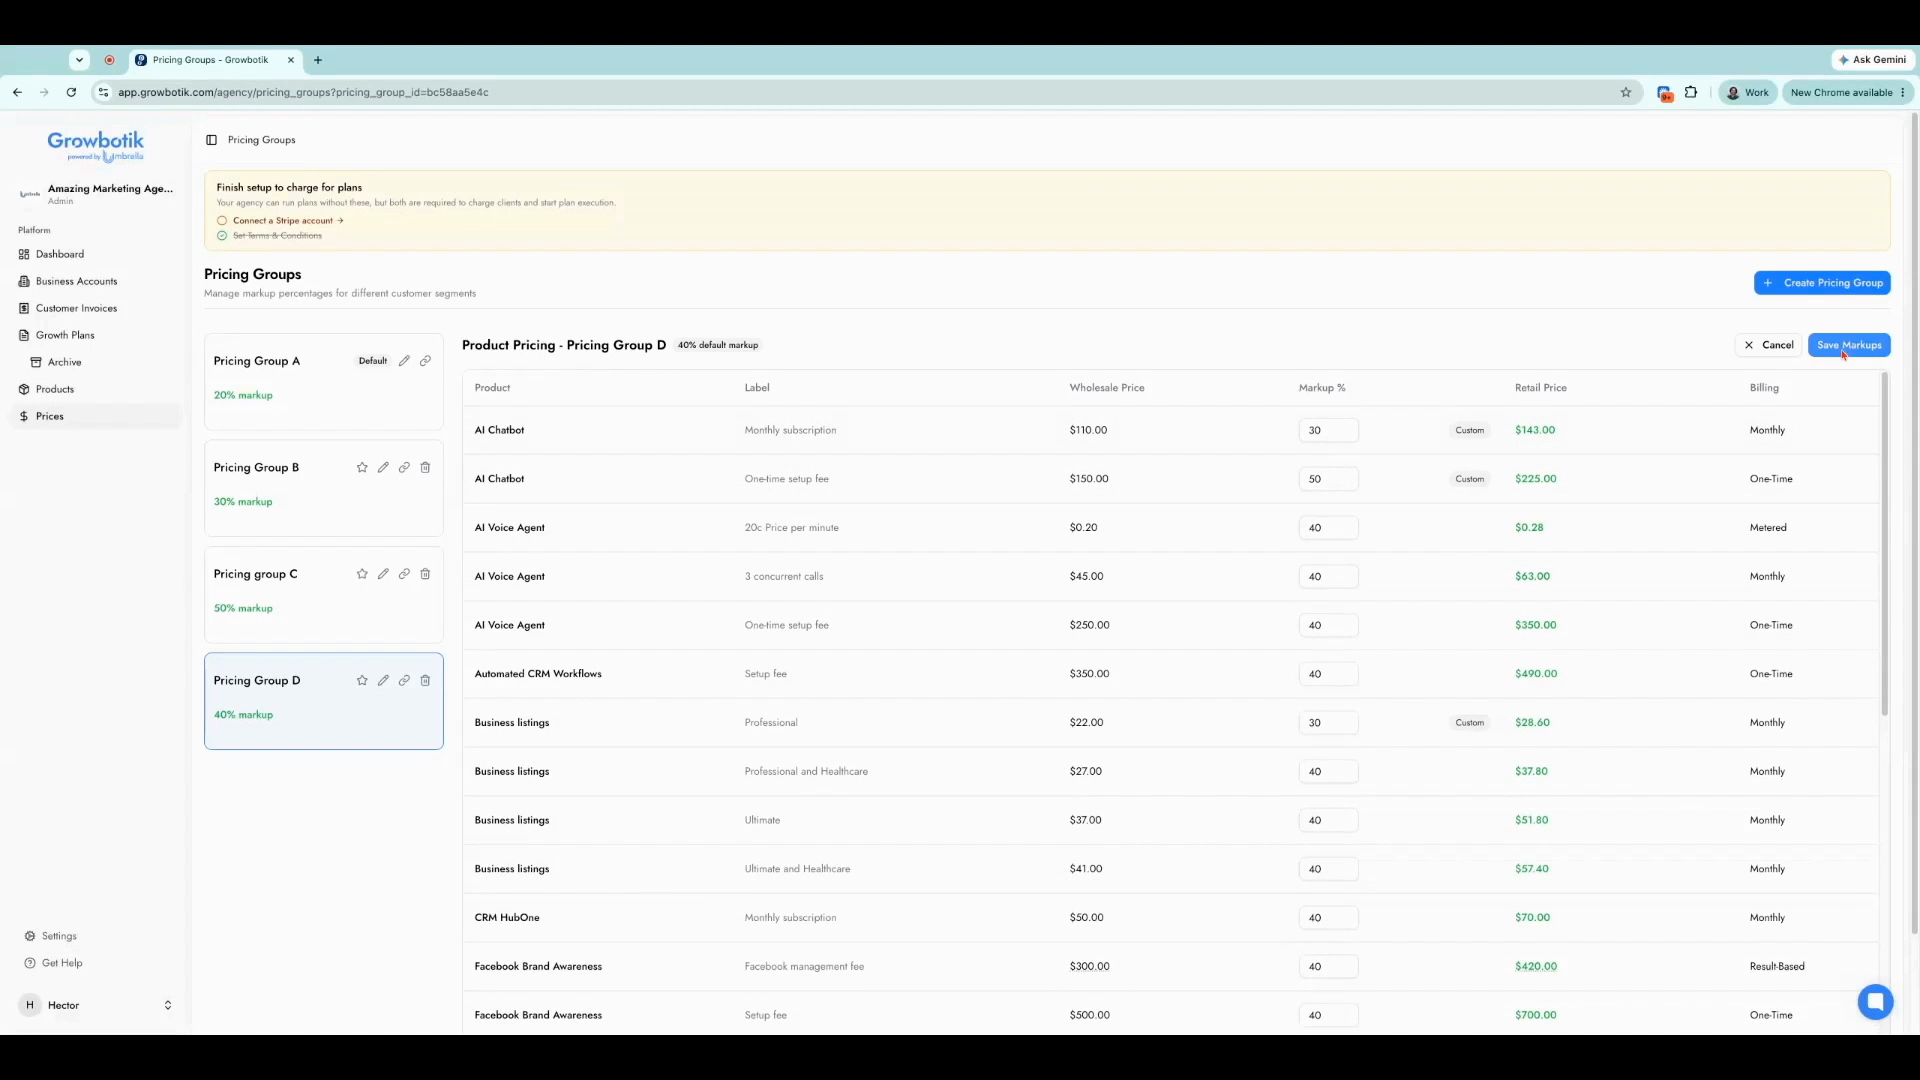
Step 7: Click Save Markups. A confirmation message appears confirming the changes were saved successfully.
Summary
You can now copy the new pricing group's link when sharing a Discovery Chat or plan — the client will see the pricing you configured. Pricing groups let you tailor pricing for different clients and services, ensuring your margins always meet your goals. Adjust markups as needed and reuse links to keep your workflow efficient.